
Top 5 Tools in Adobe Lightroom to Improve Your Photo Editing Workflow
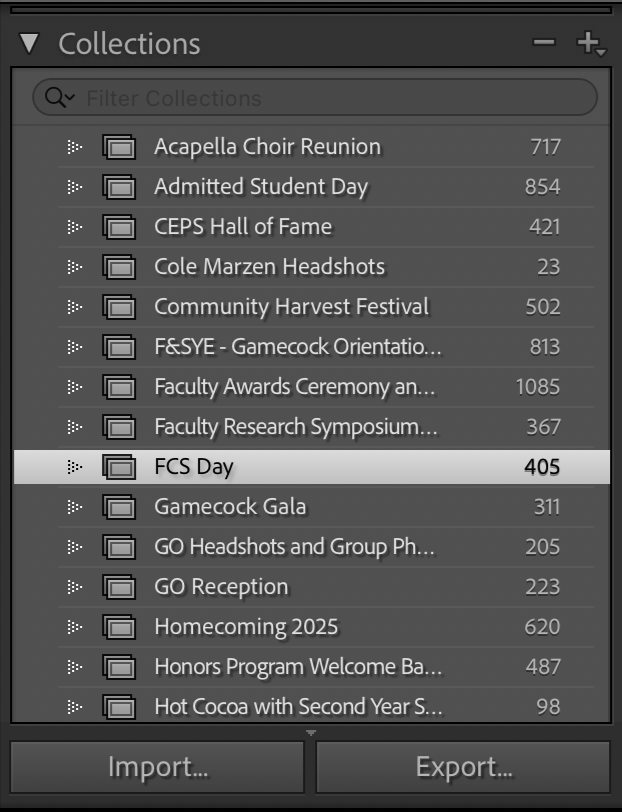
1) collections
It’s happened to photographers everywhere and anywhere. We have a handful of shoots within a short span, a random picture from 5 years ago needs an edit, we accidentally import an old screenshot of nothing, and all of a sudden the “All Photographs” section of our Lightroom catalog is completely cluttered and it’s impossible to find anything or remember what phase of the edit any of your galleries are in.
Thankfully, in Adobe’s (let’s admit it) limited wisdom, there is a quick and easy way to group and name each and every gallery into individual collections, and Lightroom’s newest update just made it even easier.
Adding to a Collection During Import
Open the Import window.
Look at the right side of the screen for the “File Handling” box.
Check the “Add to Collection” check box.
The window will expand and reveal your existing collections along with a plus symbol to create a new one.
Click the plus, name the collection whatever you’d like (I like to name mine based on what I will name the files upon export), and import as usual.
Boom. You’re golden.
If You Already Imported Your Images
Do not panic. You can create a collection after import in two easy ways.
Option one
Find the “Collections” tab on the left side of the screen.
Click the plus and choose “Create Collection.”
Name the collection and click “Create.”
Select every image you want in that gallery.
Click in the blank space of any highlighted image and drag the selection into the new collection.
Option two
In the Library menu, select all images you want in the collection.
Right click in the blank space of any selected image and choose “Add to Quick Collection.”
In the Catalog panel at the top of the screen, right click “Quick Collection” and choose “Save Collection.”
Name it whatever you’d like.
Now you’re a little more organized.
Collections are sure to help your workflow stay organized and optimized, and it’s never too late to start using them.
2) the rating and labeling system
We all know however that even inside of collections things can still get cluttered. Different photographers have different ways of managing large amounts of photos, but personally, I’ve found that the star rating system works best.
For large sessions with thousands of images, the easiest way to cull [narrow the selection of photos to edit], is to give the photos a 1-5 rating.
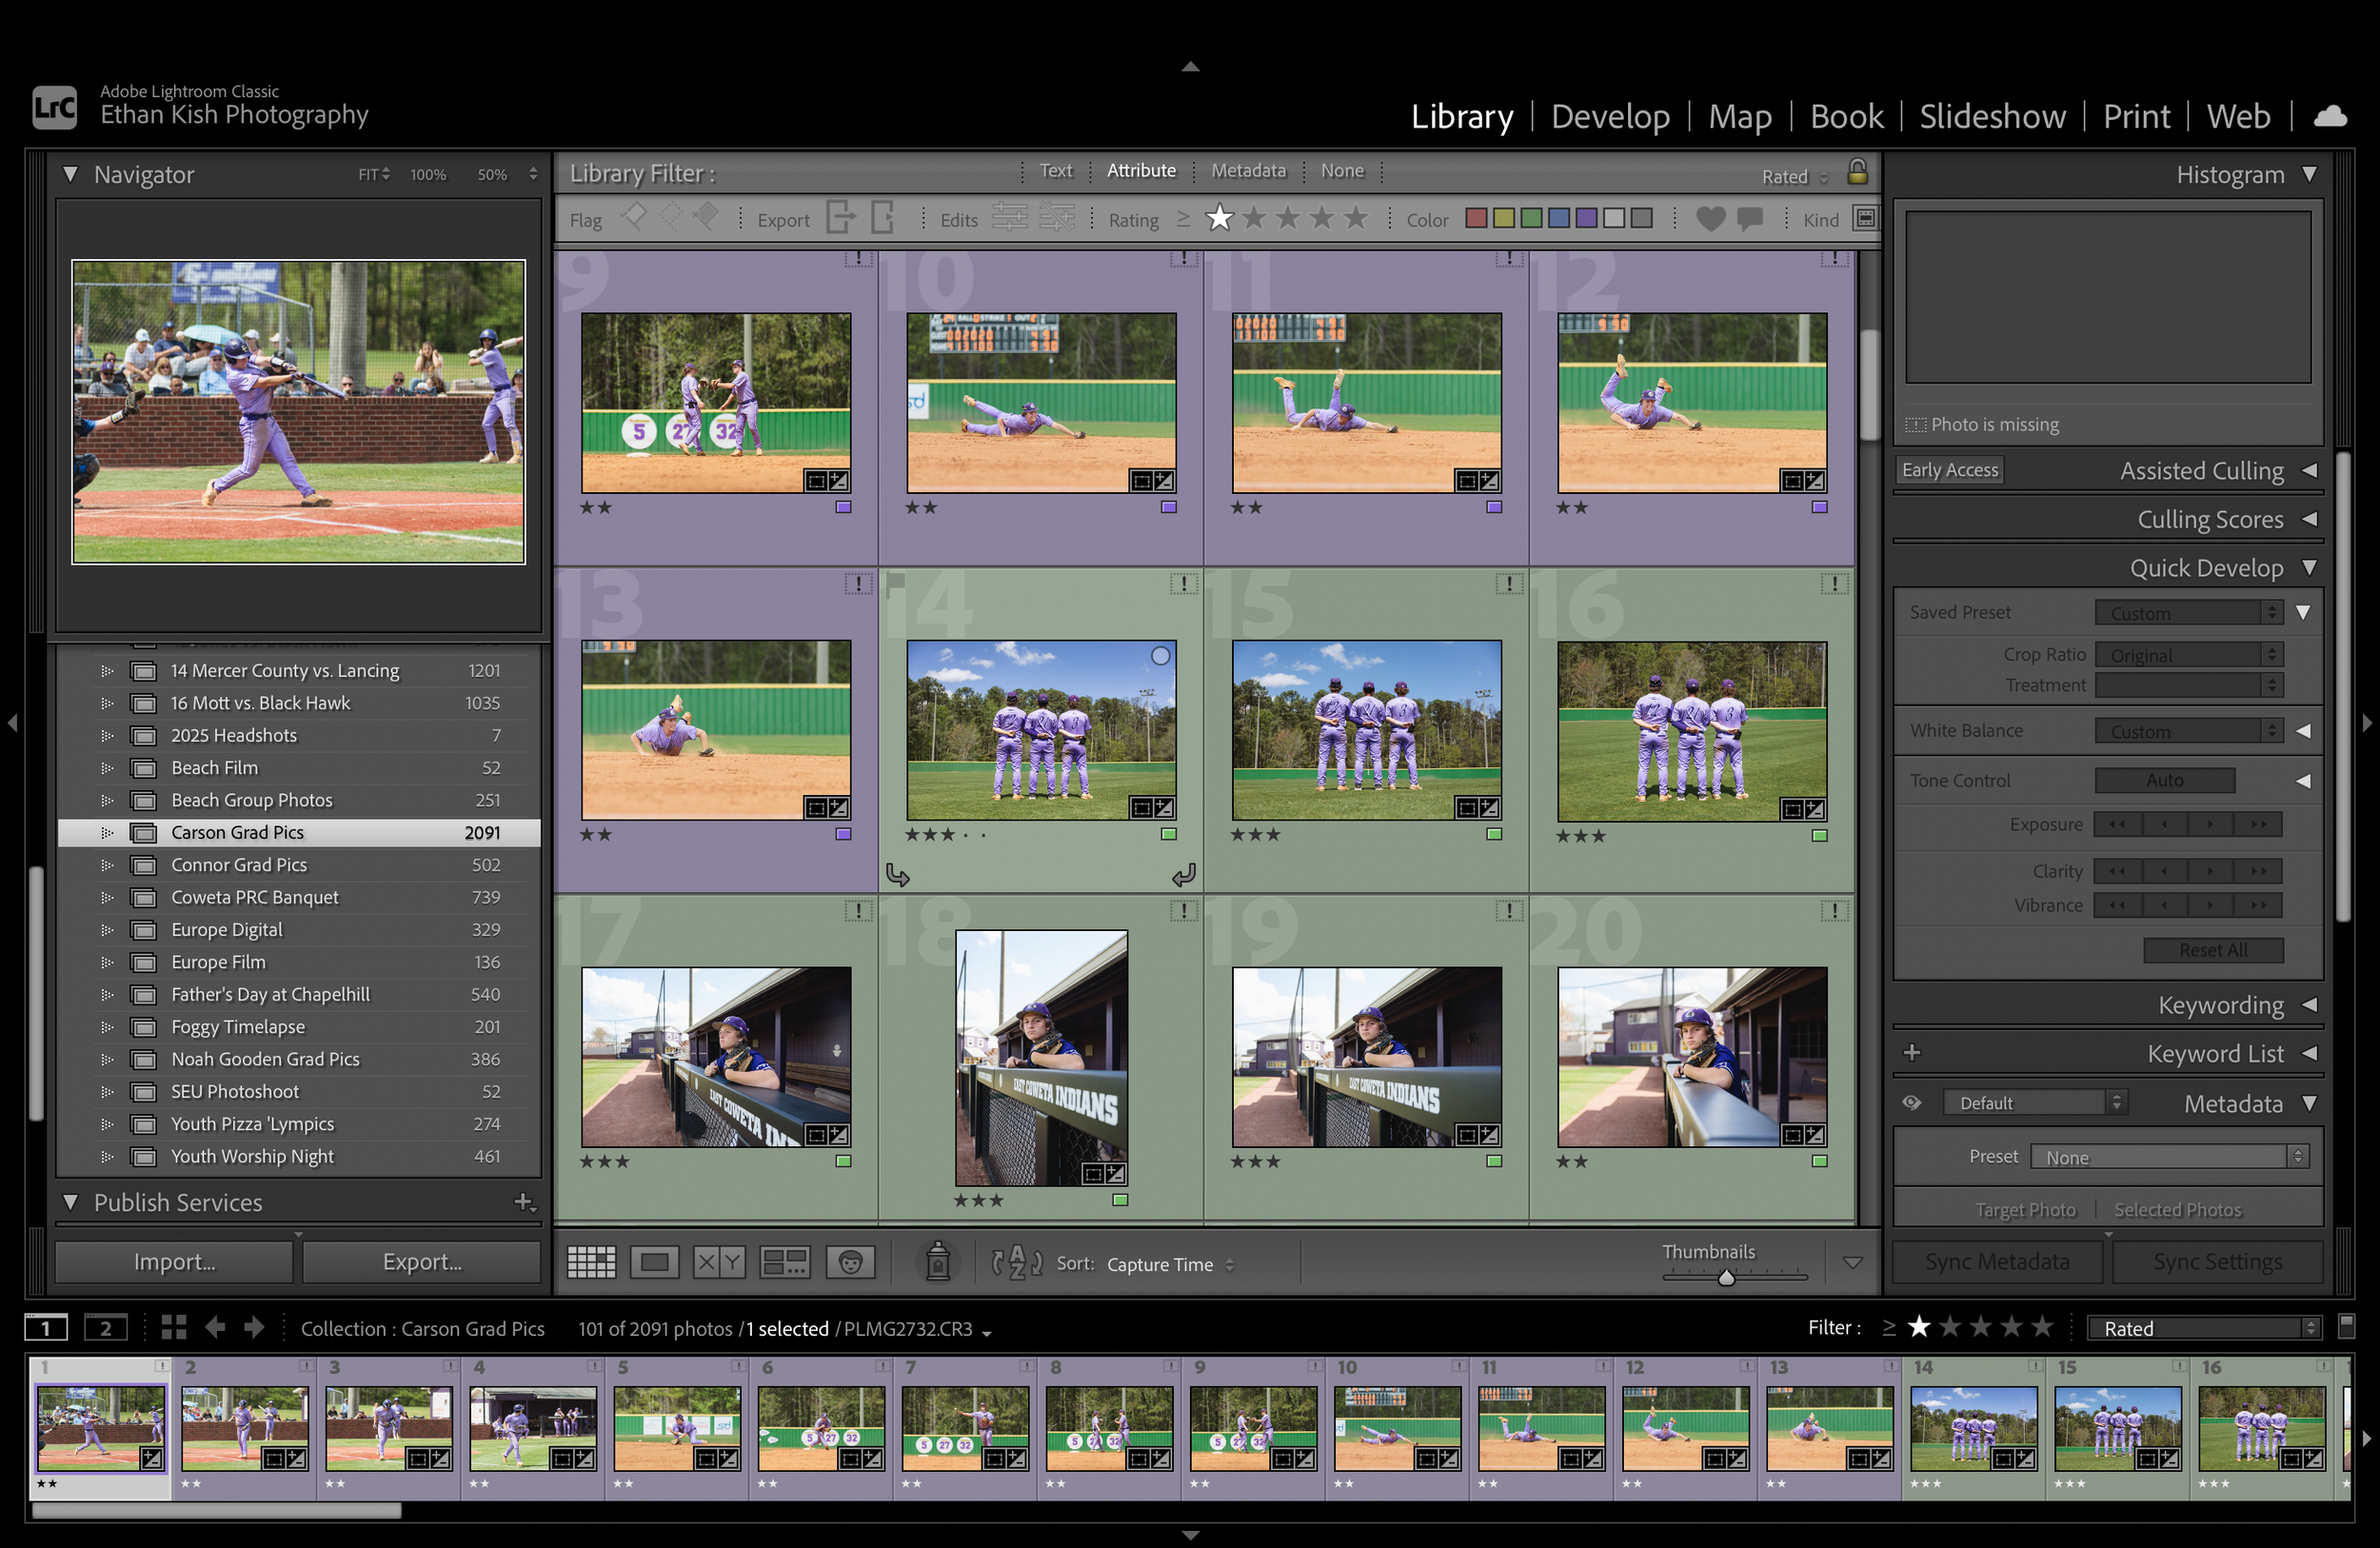
Screenshot from the Library window in Lightroom Classic
You can do this by literally just selecting 1-5 on your keyboard. Personally, I rate my selects 1 star. If I export these images, and come back to the gallery later to find new images, I change the rating of the exported images to 2, and continue to use 1 as my select rating.
It’s rare that I use the labeling system, but I have in the past. You can do this by 6-9 on your keyboard. It assigns a colored label to images that you can see in grid view or in the filmstrip at the bottom of the screen. It is helpful for visualizing how many of any kind of image you have.
For example, on a portrait shoot, images of the subject in one outfit could be labeled one color, and images of them in another outfit, another color. In the past, I labeled in-game images of my brother purple, and portraits of him on the field green. When we changed locations, I labeled those images yellow.
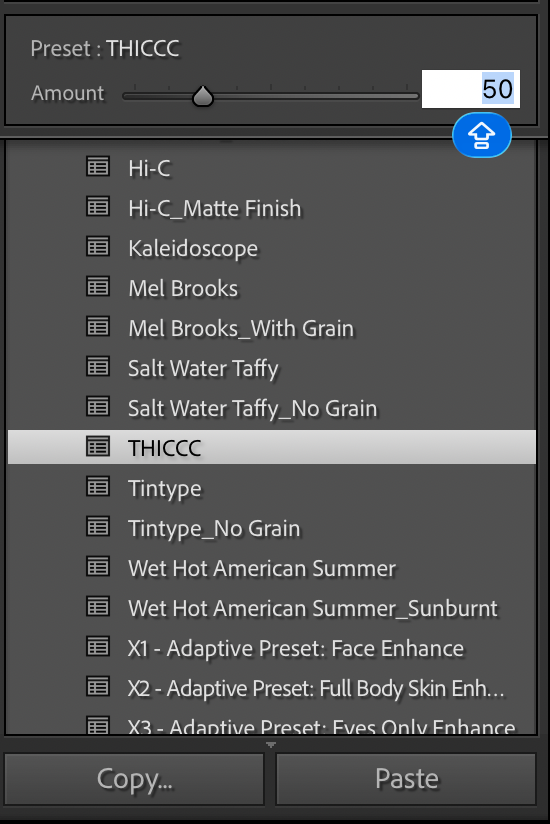
3) simple presets
HEAR ME OUT!
I know the stigma around using presets as a professional photographer. The crappy social media filters that people started calling “presets” have really turned off a lot of photographers from using actual quality presets.
It is also true that new photographers struggle to stop relying on presets and that they can often flatline their growth by not learning all that Lightroom has to offer.
However, at a certain point in your career you should be familiar enough with Lightroom that using a preset would not limit your understanding of it.
In fact, I promise using a preset uniform-ally through your edits will speed up your editing process and establish a style that people can recognize you by.
Presets are a launch-point. Not the entire edit.
Notice in the screenshot that I changed the “Amount” value of the preset. Very rarely do I ever use a preset at 100% intensity. The sweet-spot of this one is around 25%-50%.
4) keyboard shortcuts
It saves a little time, but it adds up. Remember this list of shortcuts and use them during every edit. The underlined ones are the ones I use most.
• Command Z: Undo the previous action
• Shift Command Z: Redo
• R: Crop tool
• Backslash: Show Before and After (toggle full view)
• Command Shift C: Copy Develop settings
• Command Shift V: Paste Develop settings to another photo
• 1 through 5: Apply star ratings
• 6 through 9: Apply color labels
6 Red
7 Yellow
8 Green
9 Blue
• P: Flag as Pick
• X: Flag as Reject
• Y: Side by side Before and After view
• D: Switch to Develop
• G: Switch to Grid view for culling
• E: Loupe view for single photo review
• Command E: Export selected photo(s)
5) Copyright and content credentials
Embedded copyright seems intimidating at first, but it is quicker and easier than one would think. Additionally, it does provide a level of legal protection, should your work be used without your permission.
Embedded copyright information and Content Credentials keep your content from being stolen at no credit to you. Period.
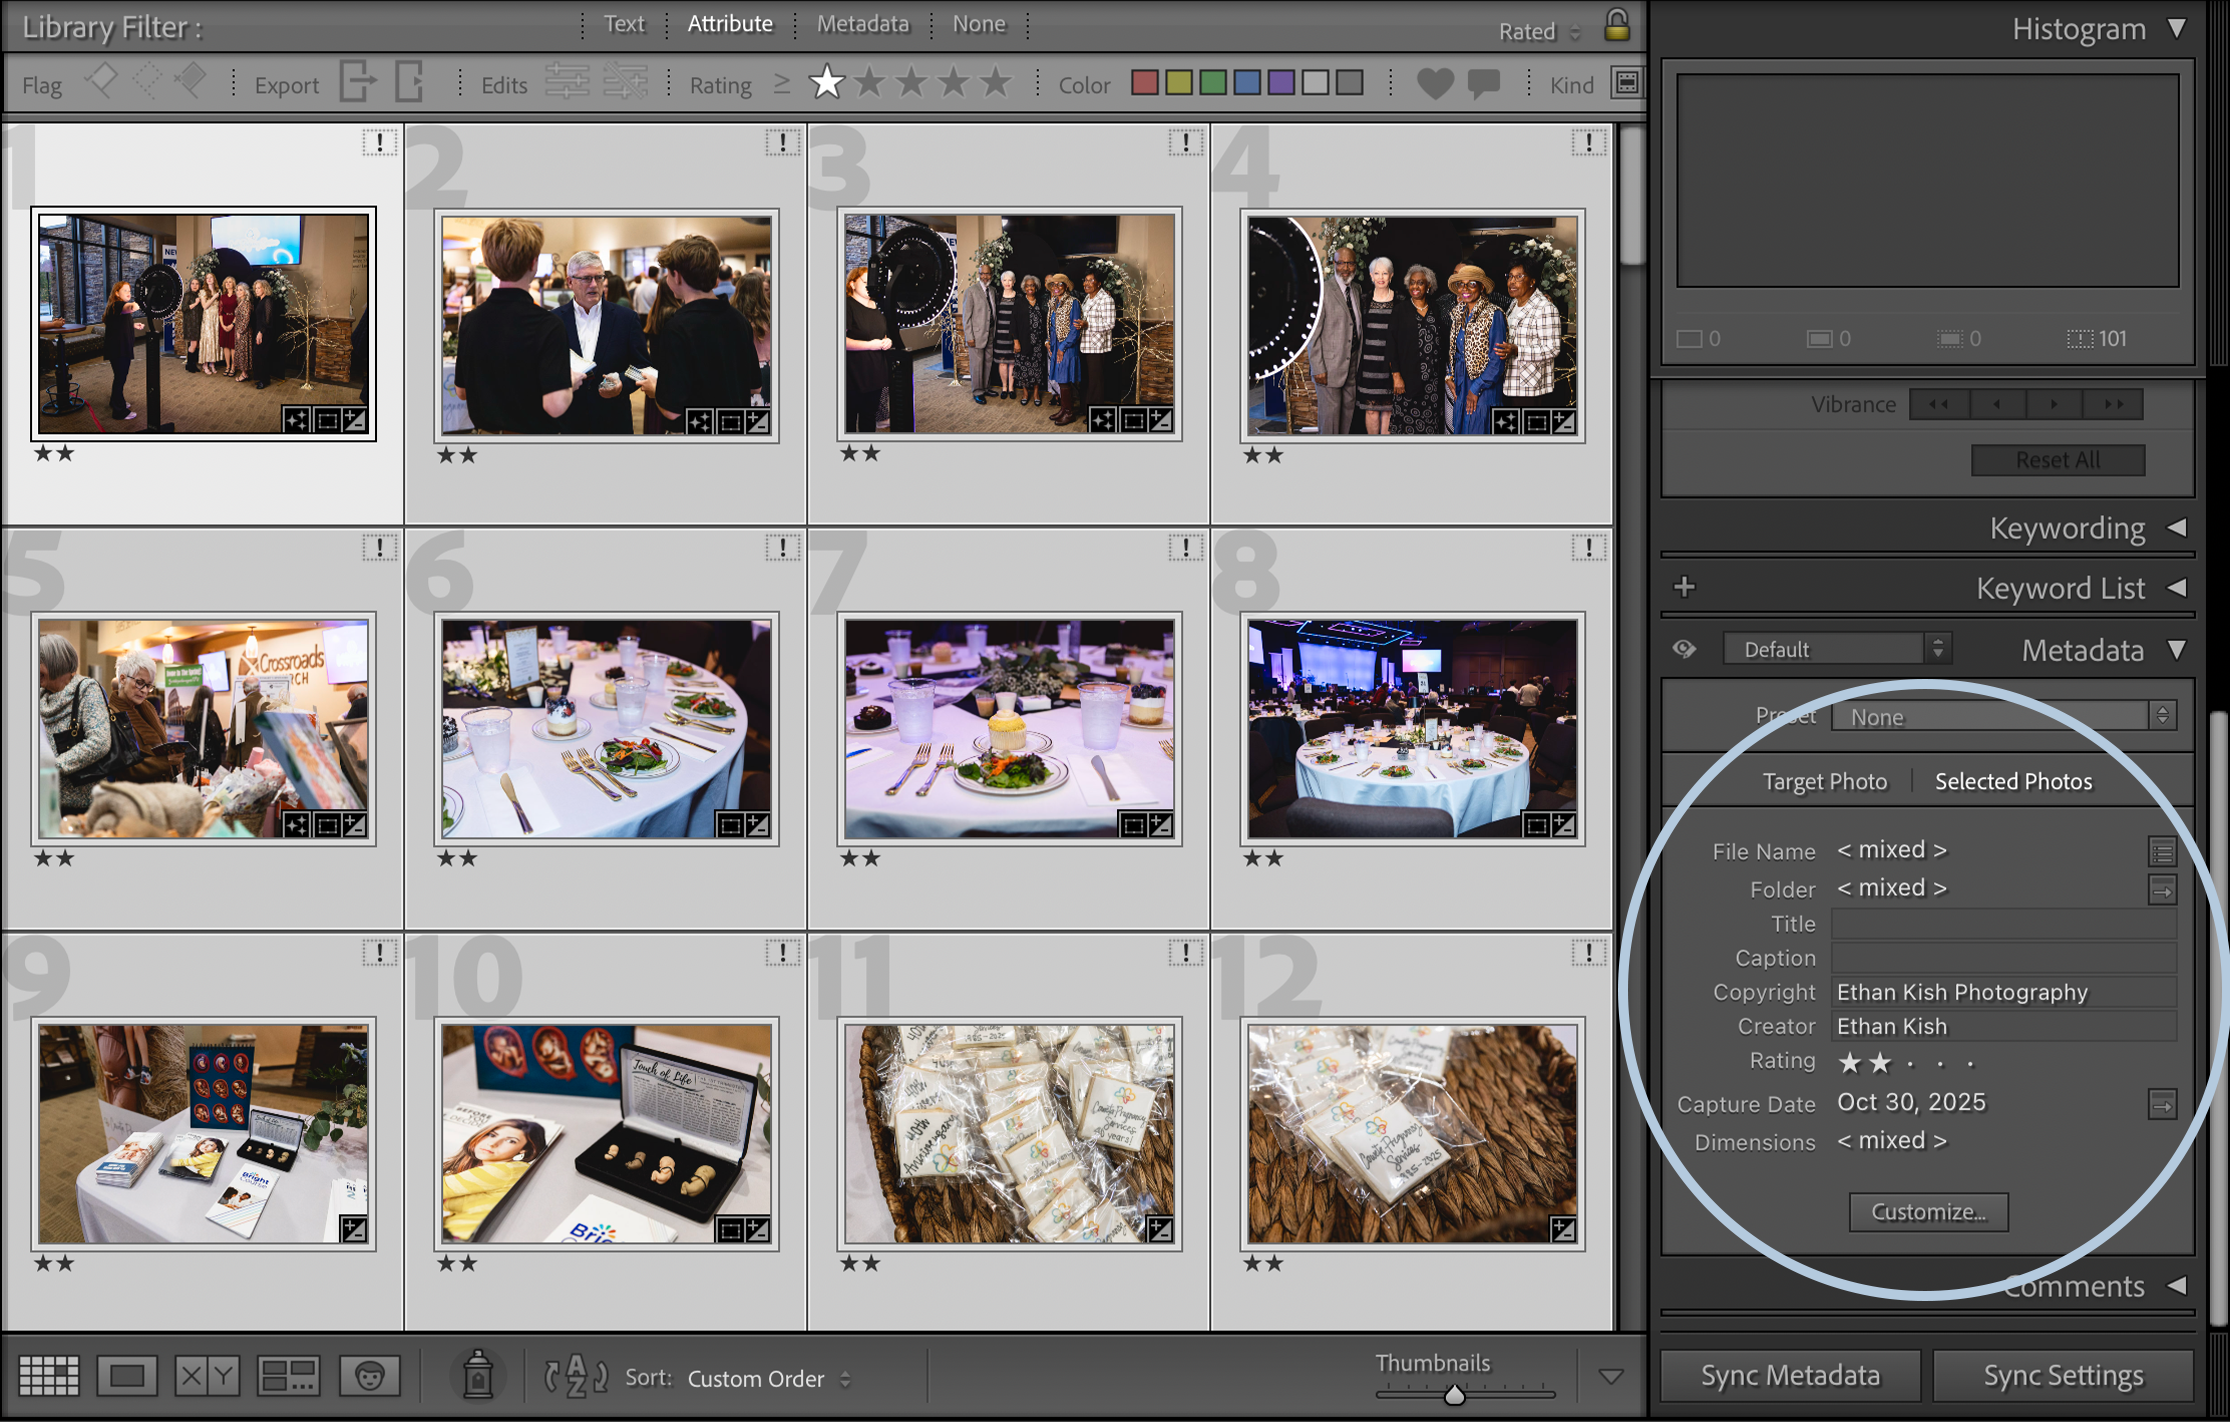
Screenshot from the Library window in Lightroom Classic with the Metadata window expanded to reveal Copyright information.
Embed copyright information
Select every image you’d like to apply copyright information to. I usually do this immediately after I’ve selected what images I’m going to edit, or sometimes immediately after the full import has finished.
Switch to the Library view.
On the right of your screen, scroll down until you see the “Metadata” block.
Make sure the selection at the top of the block is “Selected Photo,” not “Target Photo.” This ensures that every image you’ve selected will have the copyright adjustments applied to it, not just the first one you selected.
Enter your copyright in the “Copyright” box and click enter. Click “Apply to Selected.” I recommend that your copyright be the name of your company, or what you use to market yourself. For example, mine is Ethan Kish Photography.
Enter the creator in the “Creator” box and click enter. Click “Apply to Selected.” I recommend to make the creator whoever physically took the photo. Most of the times it will be yourself. However, in the case you have a second shooter shooting with you, your company name holds the copyright, and your second shooter was the creator.
The current technological landscape of AI in creative industries has so many more implications than I’d be able to cover in this already lengthy blog post. Two areas that have been specifically worrisome for creators in all spaces are
how do we know whats real, and how are we compensated for AI Models that undoubtedly train on our content?
Thankfully for creatives everywhere, The Coalition for Content Provenance and Authenticity, or C2PA for short, has been developing a method for keeping track of where content originates from, and what changes were ever made to it.
Whereas AI detectors of now check for proof that something is fake, C2PA proves that something is unequivocally real. The goal is that sometime in the future every camera will embed encrypted C2PA metadata, called Content Credentials into every image the camera takes.
While this is not the reality now, companies like Adobe have partnered with C2PA to allow Content Credentials to be created at the import of the image into Lightroom or Photoshop, and be embed in the image and/or uploaded to a cloud on export.
By uploading the data to the cloud, even as much as a screenshot of an image with C2PA metadata can be scanned for visual matches and be tracked back to the origin of the source file(s). If an image is AI generated, the C2PA scanner will alert that the image is either entirely, or partially AI generated.
Furthermore, when registering the details of your Content Credentials, you can verify your name by attaching your LinkedIn account, and attach your Instagram, Twitter, and Behance accounts. Therefore, if an image created by you is scanned through the C2PA scanner, along with AI info, it will detail the information of the creator.
Okay enough talk. How do you enable it in Lightroom?
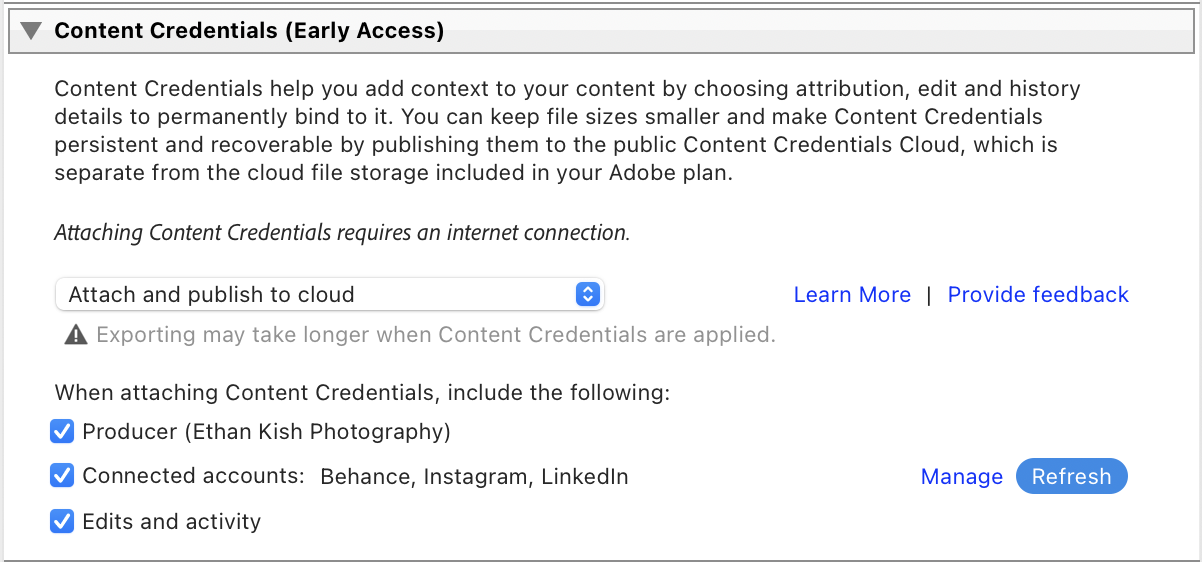
Attach and/or publish Content Credentials to the cloud
Select the photos you want to export and choose File > Export.
In the Export dialog, set File Settings > Format to JPEG (Content Credentials require JPEG).
Scroll down to the Content Credentials (Early Access) panel. Click Manage if you need to connect accounts or edit your Producer info; click Refresh afterward if you just updated preferences.
Choose the Storage method: Publish to Content Credentials cloud, Attach to files, or Attach and publish.
Tick the specific items to include (Producer, Connected accounts, Edits and activity).
Click Export. If you published to the cloud, Adobe will upload the credentials and they become discoverable via Adobe Inspect.
Conclusion
As professional photographers, the work doesn’t stop when the shoot is over. Most clients often have no idea what kind of work goes in behind the scenes, and they often expect quick turnaround times.
It’s important to spend our time in the most efficient and productive way possible.
Not just for the clients, but for our wellbeing too. Keep these tips in mind from now on to keep yourself sharp in Lightroom.